Virtual reality has been around for a while and the technology has always been fairly inaccessible until more recently.
With the development of high resolution LCD screens on smart phones and a brilliant idea to combine them with a cheap $5 cardboard headset, any architect that owns these two things can put their Sketchup model into a 3d virtually environment for their clients (or themselves) to experience.
It works by displaying calibrated left and right eye images on your smartphone to give you a stereoscopic view, while the gyroscopes in the phone are used to follow your head movement when you look around. The headset basically funnels your view onto the phone’s screen. It is an uncanny experience that is difficult to describe, but very cool and guaranteed to impress your clients. The bigger the phone the better. Just be careful that they don’t throw up on you when they start getting motion sickness (seriously!).
It is not very hard to do either. I have found Kubity to be the best app available for both iOS and Android. I’ve numbered the steps to make it easy:
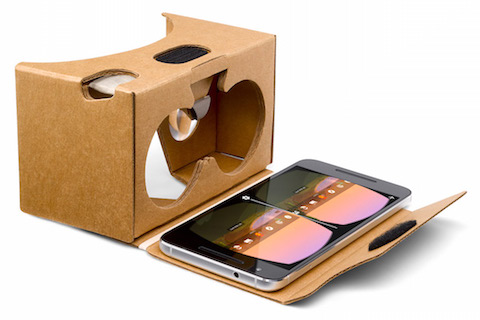
- Purchase a headset starting from the $5 cardboard variety to more upmarket plastic ones which can cost from anything up to $300. Best to get one with a touch screen trigger.
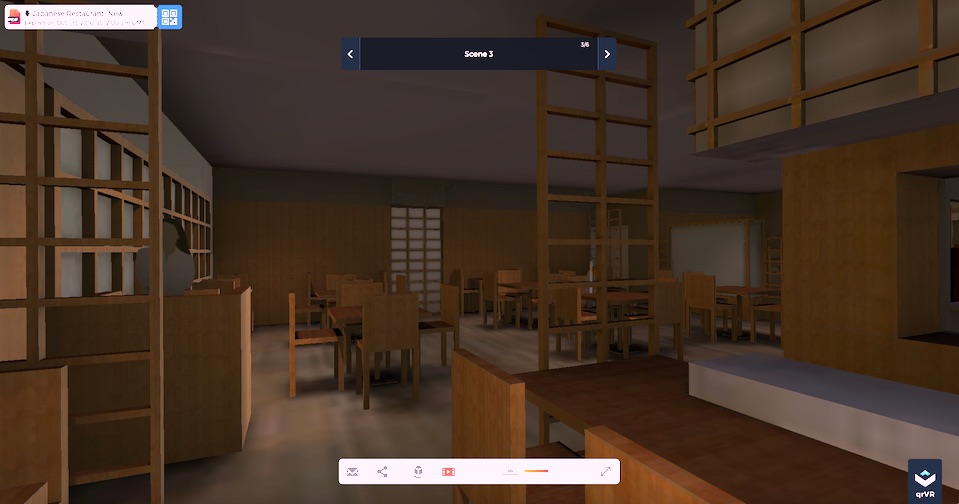
- Save your Sketchup model file. Make sure that you have some scenes saved because this will help you reset your view later on if you get disorientated in your model.
 Download the Kubity app onto your smartphone.
- Head to Kubity’s model upload site on a standard computer: https://www.qrvr.io/ and upload the model. Or, you can download the Kubity plugin from the Extension Warehouse and upload the model directly from within Sketchup.
- Once uploaded you will get a QR code that looks something like the pixellated square on the right. Open the Kubity app on your phone and change the mode to read the QR code. Once recognised, the model will automatically load to your phone.
 Change the model into VR mode (you’ll see a left and right eye image on your phone) and put it into your headset. Adjust the position of the phone to get the best stereo view and then put them on!
- Look down at your feet and trigger the “Play” mode to access the saved scenes in the model, or “Stop” mode which allows you to walk around your model using the trigger to step forward.
You can also email the web address or the QR code to your client so that they can look at it for themselves.
Kubity is current free but I am assuming that they will try and monetise the app in the not-to-distant future. At that point I hope the native Sketchup viewer for iOS and Android pick up the trail and support VR.
Kubity, at the time of writing, does not support various features in Sketchup. The display of the model is just of the textured faces, no linework or style info and face-me components are static and do not follow the camera. Sketchup models can look a bit flat as a result.

If you are up for a challenge, you can improve that output in Kubity by using a technique known as “texture baking” where you effectively project the effect of lighting into the textures of your model. It can really make your Sketchup models come alive, especially for virtual reality. It is a complex process and the subject of another hint & tips page, but to give you an overview (and this may not be the only way), you need to get a 3rd party renderer called Lightup and an FBX importer, both available from the Extension Warehouse. Lightup isn’t cheap but it is the only renderer for Sketchup that I know of that can do texture baking. Set your lighting up in Lightup, export it as a texture-baked FBX, and then reimport the file back into Sketchup. It takes a bit of fiddling but the results are worth it! See below.